15 Delicious and Budget-Friendly Lunchbox Recipes
Planning lunches on a budget can feel challenging, but it doesn’t have to be! This collection of 15 budget-friendly lunchbox recipes is all about keeping things simple, tasty, and wallet-friendly. From hearty wraps to zesty salads, these recipes will help you pack delicious meals without breaking the bank. Get ready to fill those lunchboxes with goodness!
Turkey and Cheese Roll-Ups
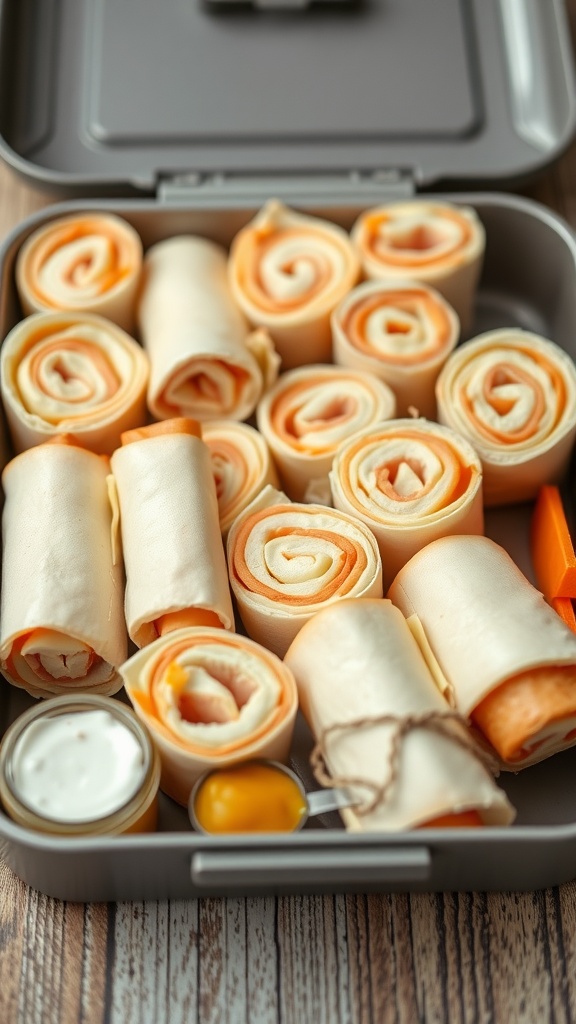
Turkey and cheese roll-ups are a delightful and easy lunch option that packs a punch of flavor without breaking the bank. These tasty bites feature savory turkey slices rolled with creamy cheese, making them a hit with both kids and adults. They are not only quick to assemble but also customizable, allowing you to mix and match your favorite ingredients.
The combination of the tender turkey and the smooth, melting cheese creates a satisfying snack or lunch that is perfect for busy days. Ideal for lunchboxes, these roll-ups can be paired with your choice of dips, adding an extra layer of taste. Enjoy them fresh or make them ahead to save time!
Ingredients
- 8 slices of turkey breast
- 4 slices of cheese (cheddar or Swiss)
- 1/2 cup cream cheese
- 1/2 cup bell pepper, thinly sliced
- 1 tablespoon mustard (optional)
Instructions
- Spread cream cheese over each turkey slice evenly.
- Place a slice of cheese on top of each turkey slice.
- Add a few slices of bell pepper, and drizzle mustard if using.
- Roll each turkey slice tightly and secure with a toothpick or string if needed.
- Cut into bite-sized pieces or serve whole.
Vegetable Fried Rice
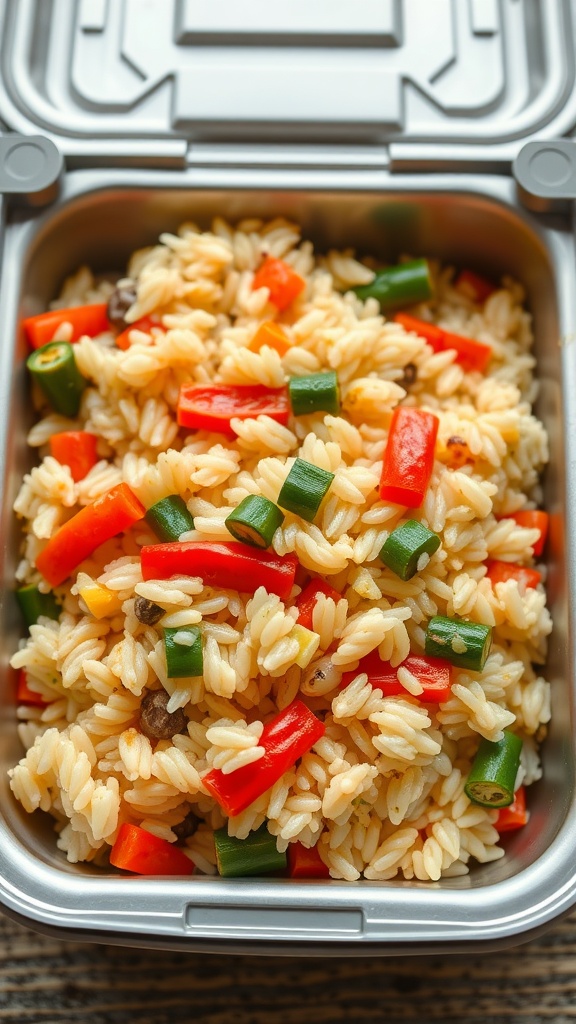
Vegetable fried rice is a delightful and simple dish that packs a punch of flavor while being budget-friendly. This recipe is perfect for using up leftover rice and any vegetables you have on hand, making it a versatile option for lunchboxes or quick dinners. The combination of colorful veggies adds both texture and nutrition, while soy sauce gives it that savory taste we all love.
What’s great about this dish is how easy it is to throw together. With just a few ingredients, you can whip up a satisfying meal that’s sure to please everyone. It’s a quick solution for busy days, and kids love its tasty, familiar flavors!
Ingredients
- 2 cups cooked rice (preferably day-old)
- 1 cup mixed vegetables (like peas, carrots, and bell peppers)
- 2 green onions, chopped
- 2 tablespoons soy sauce
- 1 tablespoon vegetable oil
- 1 teaspoon sesame oil (optional)
- Salt and pepper to taste
Instructions
- Heat the vegetable oil in a large skillet or wok over medium heat.
- Add the mixed vegetables and stir-fry for about 3-4 minutes until they are tender.
- Stir in the cooked rice, breaking up any clumps, and cook for another 3 minutes until heated through.
- Add the soy sauce and sesame oil, mixing well to combine. Cook for an additional 2 minutes.
- Season with salt, pepper, and toss in the green onions just before serving.
Chickpea Salad Sandwich
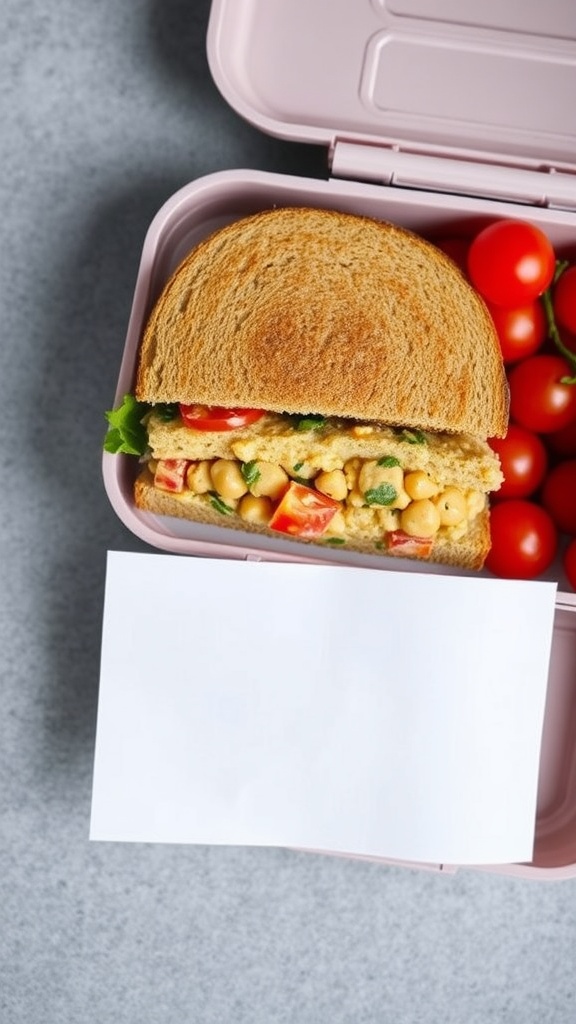
The chickpea salad sandwich is a tasty and nutritious option that’s perfect for lunch. It’s packed with protein from chickpeas and filled with crunchy veggies, making it both satisfying and refreshing. This recipe is simple to whip up, ideal for meal prep, and a great way to impress your taste buds without breaking the bank.
The flavors blend beautifully, with a hint of tanginess that complements the creamy texture of the chickpeas. Enjoy it on whole grain bread for a wholesome meal that’s not only delicious but also budget-friendly.
Ingredients
- 1 can (15 oz) chickpeas, drained and rinsed
- 1/4 cup plain yogurt (or vegan alternative)
- 1 tablespoon lemon juice
- 1/4 cup chopped celery
- 1/4 cup diced bell pepper
- 2 tablespoons chopped fresh parsley
- Salt and pepper to taste
- Whole grain bread
- Lettuce leaves (for serving)
Instructions
- In a mixing bowl, mash the chickpeas with a fork or potato masher until chunky.
- Add yogurt, lemon juice, celery, bell pepper, and parsley. Stir until combined.
- Season with salt and pepper to taste.
- Spread the chickpea mixture onto slices of whole grain bread, adding lettuce leaves if desired.
- Top with another slice of bread, cut in half, and serve.
Egg Muffins with Spinach and Cheese
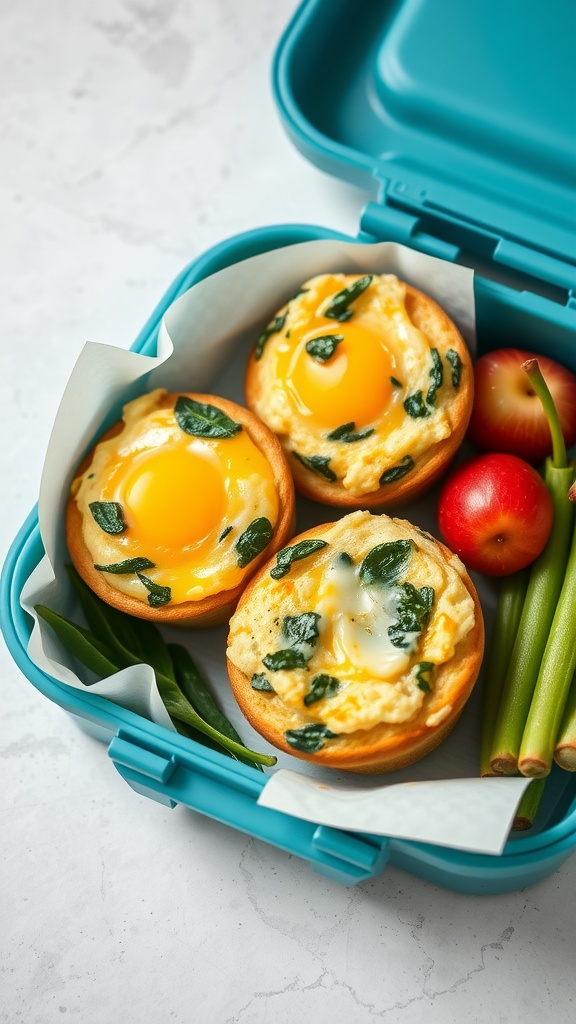
Egg muffins with spinach and cheese are a tasty and nutritious option for those looking for a quick lunch. These delightful bites are packed with protein and flavor, making them a fantastic choice for both kids and adults. With a combination of fresh spinach and gooey cheese, they promise a delicious taste that can brighten up any lunchbox.
What’s great about these egg muffins is how easy they are to make. Just mix your ingredients, pour them into a muffin tin, and bake! They are perfect for meal prep, as you can whip up a batch at the beginning of the week and enjoy them throughout. Plus, they are adaptable; you can toss in any veggies or proteins you have on hand.
Ingredients
- 6 large eggs
- 1 cup fresh spinach, chopped
- 1 cup shredded cheese (cheddar or your choice)
- 1/4 cup milk
- Salt and pepper to taste
- Optional: diced bell peppers, onions, or cooked ham
Instructions
- Preheat your oven to 350°F (175°C) and grease a muffin tin.
- In a large bowl, whisk together the eggs, milk, salt, and pepper until well combined.
- Add the chopped spinach and cheese (and any optional ingredients if using) to the egg mixture and stir until evenly distributed.
- Pour the mixture into the prepared muffin tin, filling each cup about 3/4 full.
- Bake for 18-20 minutes, or until the muffins are set and lightly golden on top.
- Allow to cool for a few minutes before carefully removing them from the tin. Enjoy warm or store in the fridge for later!
Mini Pita Pockets with Hummus
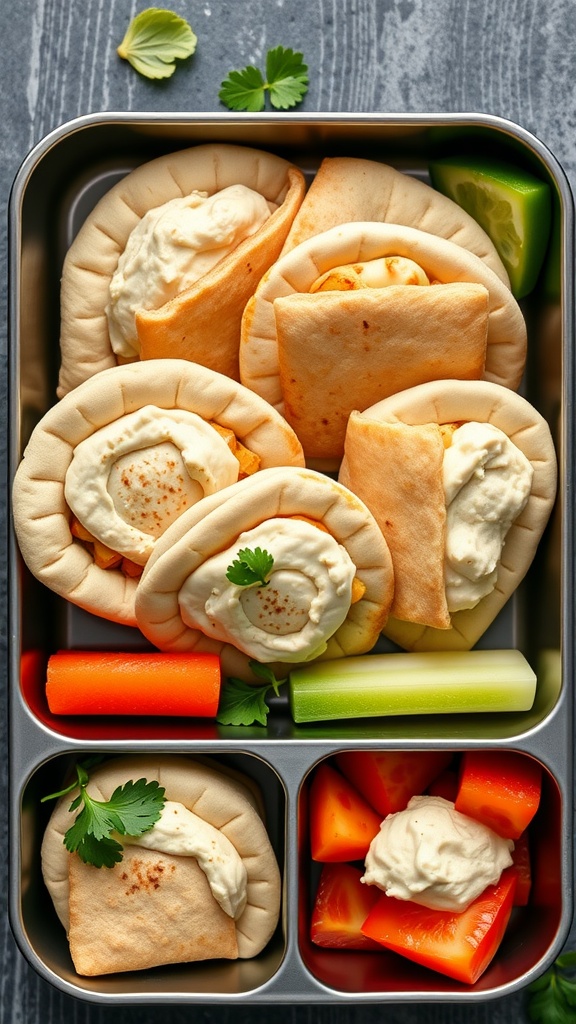
Mini pita pockets filled with hummus are a fun and tasty way to enjoy a healthy lunch. These little delights are creamy, savory, and packed with flavor. They are simple to make and perfect for on-the-go meals or lunchboxes.
With a fluffy pita bread wrapping around smooth hummus, they make each bite a delightful experience. You can customize them with veggies or proteins of your choice, making them versatile for any palate. They are not only budget-friendly, but also quick to prepare, ensuring you’ll want to whip them up again and again!
Ingredients
- 8 mini pita breads
- 1 cup hummus (store-bought or homemade)
- 1 small cucumber, diced
- 1 large carrot, shredded
- 1 bell pepper, diced
- Fresh cilantro or parsley, for garnish
- Salt and pepper to taste
Instructions
- Prepare the Pita: Cut each mini pita bread in half to create pockets.
- Fill the Pockets: Spread about two tablespoons of hummus into each pita half.
- Add Veggies: Stuff the pockets with diced cucumber, shredded carrot, and bell pepper. Season with salt and pepper to taste.
- Garnish: Top with fresh cilantro or parsley for an added touch of flavor.
- Serve: Enjoy immediately, or pack them in a lunchbox for a delicious meal on the go.
Homemade Pizza Rolls

Homemade pizza rolls are a fun and delicious way to enjoy your favorite pizza flavors in a portable form. With their soft, chewy dough filled with savory tomato sauce and cheese, these rolls are sure to please both kids and adults alike. They are simple to make and perfect for lunchboxes, snack time, or even a quick dinner option.
These pizza rolls offer a delightful taste of comfort food, combining gooey cheese and tangy sauce all wrapped up in a warm dough. Plus, you can customize them with your favorite toppings, making them versatile for any palate. Let’s get started on creating these tasty treats!
Ingredients
- 2 cups all-purpose flour
- 1 teaspoon active dry yeast
- 1 teaspoon sugar
- 1/2 teaspoon salt
- 3/4 cup warm water
- 1 tablespoon olive oil
- 1/2 cup pizza sauce
- 1 cup shredded mozzarella cheese
- Optional: pepperoni slices, bell peppers, or your favorite toppings
Instructions
- Make the Dough: In a bowl, combine warm water, yeast, and sugar. Let it sit for 5 minutes until frothy. Stir in olive oil, salt, and flour, mixing until a soft dough forms.
- Knead the Dough: Transfer the dough to a floured surface and knead for about 5 minutes until smooth. Place it in a greased bowl, cover it, and let it rise for 30 minutes.
- Prepare the Filling: Once the dough has risen, roll it out into a rectangle. Spread pizza sauce evenly over the dough, leaving a border. Sprinkle mozzarella cheese and any additional toppings you like on top.
- Roll and Slice: Starting from one edge, roll the dough tightly into a log. Slice into equal portions, about 1 inch thick, and place them on a baking sheet lined with parchment paper.
- Bake: Preheat the oven to 375°F (190°C). Bake for 15-20 minutes, until golden brown. Serve warm with extra pizza sauce for dipping.
Pasta Salad with Italian Dressing
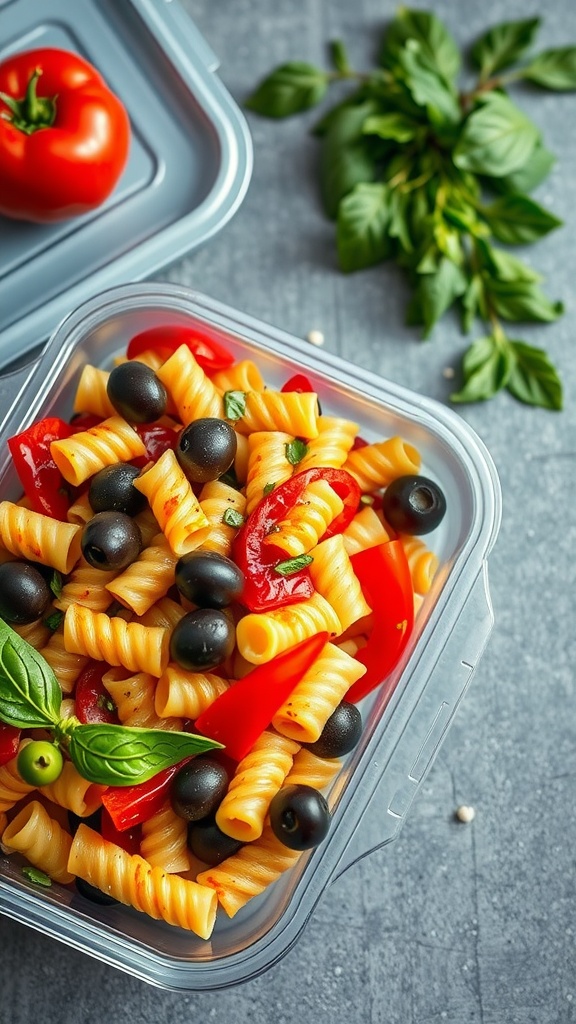
This pasta salad is a delightful mix of flavors that makes lunchtime exciting. The tangy Italian dressing brings a burst of flavor, while the fresh vegetables add crunch and color. It’s super easy to whip up, making it a perfect dish for busy days.
Loaded with colorful ingredients like bell peppers and olives, this salad not only tastes great but also looks appetizing. It’s a budget-friendly option that’s perfect for lunchboxes or picnics, ensuring your meal is both satisfying and vibrant.
Ingredients
- 2 cups rotini pasta
- 1 cup cherry tomatoes, halved
- 1 cup bell peppers, chopped
- 1/2 cup black olives, sliced
- 1/4 cup red onion, diced
- 1/2 cup Italian dressing
- 1/4 cup fresh basil, chopped
- Salt and pepper to taste
Instructions
- Cook the Pasta: Boil the rotini pasta according to package instructions until al dente. Drain and rinse under cold water to cool.
- Mix the Ingredients: In a large bowl, combine the cooked pasta, cherry tomatoes, bell peppers, black olives, and red onion.
- Add the Dressing: Pour the Italian dressing over the pasta mixture. Toss everything together until well coated.
- Season: Sprinkle with salt, pepper, and fresh basil. Stir to combine.
- Chill: Refrigerate for at least 30 minutes before serving to let the flavors meld.
Savory Quinoa Salad with Veggies
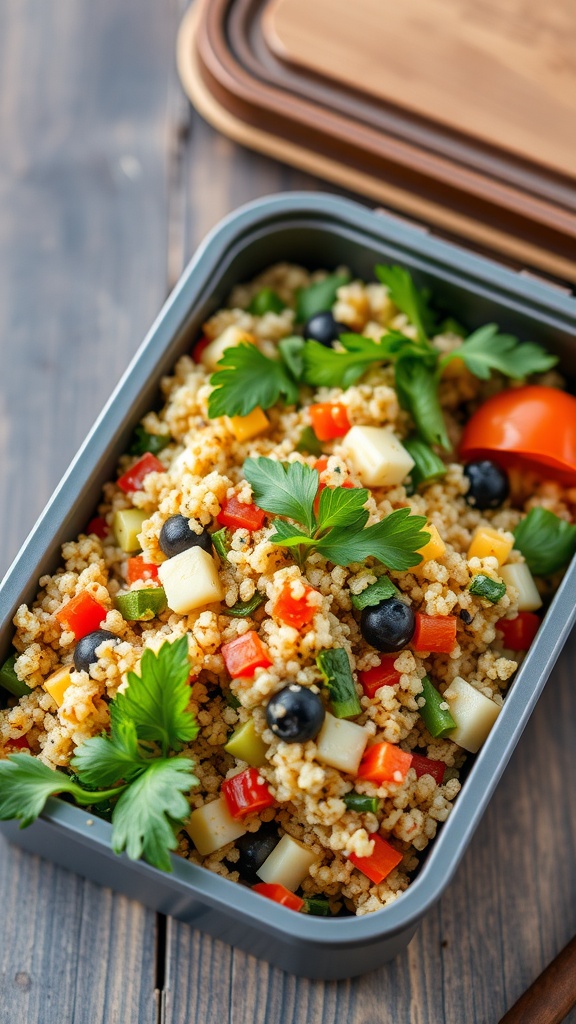
This Savory Quinoa Salad is a delightful mix of colors and flavors, perfect for a budget-friendly lunch. Packed with wholesome veggies and a light dressing, it’s both refreshing and satisfying, making it a great option for any lunchbox.
Making this salad is super easy and can be done in just a few steps. You can customize it with your favorite vegetables and enjoy a dish that’s not only nutritious but also delicious!
Ingredients
- 1 cup quinoa
- 2 cups vegetable broth or water
- 1 bell pepper, diced
- 1 cucumber, diced
- 1 cup cherry tomatoes, halved
- 1 cup black beans, drained and rinsed
- 1/4 cup red onion, finely chopped
- 1/4 cup fresh parsley, chopped
- 1/4 cup olive oil
- 2 tablespoons lemon juice
- Salt and pepper to taste
Instructions
- Cook the Quinoa: Rinse the quinoa under cold water. In a saucepan, combine quinoa and vegetable broth. Bring to a boil, then reduce heat, cover, and simmer for 15 minutes or until the liquid is absorbed. Fluff with a fork and let cool.
- Mix the Ingredients: In a large bowl, combine the cooled quinoa with diced bell pepper, cucumber, cherry tomatoes, black beans, red onion, and parsley.
- Prepare the Dressing: In a small bowl, whisk together olive oil, lemon juice, salt, and pepper. Pour over the salad and toss gently to combine.
- Serve: Enjoy immediately or store in the fridge for up to 3 days. This salad makes for a great make-ahead meal!
Greek Yogurt Parfait
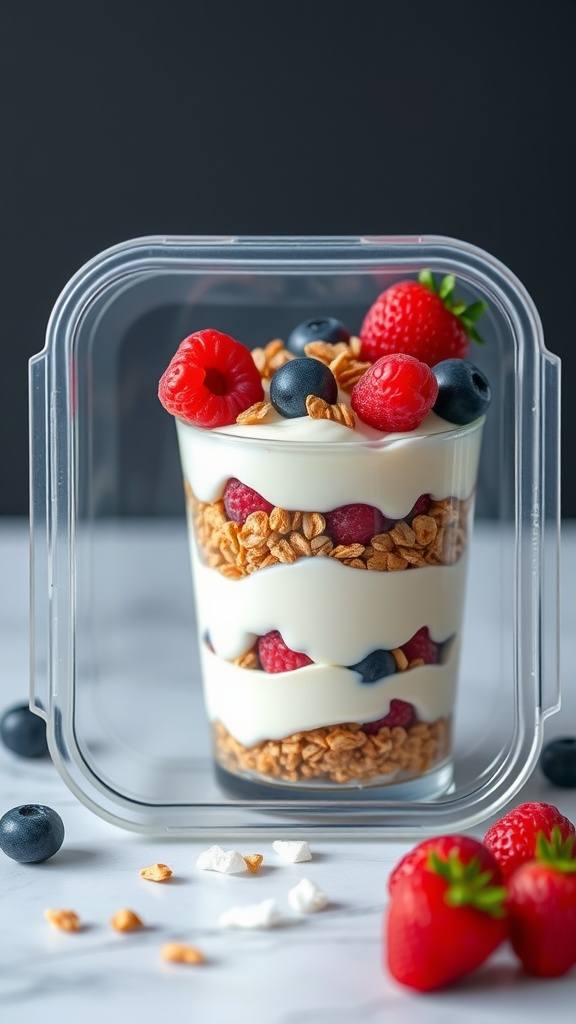
A Greek yogurt parfait is a delicious and healthy choice for lunchboxes. With layers of creamy yogurt, crunchy granola, and fresh fruit, it offers a delightful combination of flavors and textures. This parfait is not only easy to make but also customizable, allowing you to incorporate your favorite fruits and toppings.
The taste is both refreshing and satisfying, making it a great option for both kids and adults. Plus, it can be prepared in just a few minutes, making it perfect for busy mornings. Grab a jar, layer the ingredients, and you’re ready to go!
Ingredients
- 2 cups Greek yogurt
- 1 cup granola
- 1 cup mixed berries (strawberries, blueberries, raspberries)
- 1 tablespoon honey (optional)
- Mint leaves for garnish (optional)
Instructions
- Layer 1/2 cup of Greek yogurt at the bottom of a jar or container.
- Add a layer of granola (about 1/4 cup) on top of the yogurt.
- Next, add a layer of mixed berries (about 1/3 cup).
- Repeat the layers until the jar is filled, finishing with berries on top.
- If desired, drizzle honey over the top and garnish with mint leaves.
- Seal the container and store it in the fridge until ready to enjoy!
Veggie and Cheese Snack Box

The Veggie and Cheese Snack Box is a delightful and healthy option for lunch or a quick snack. It’s a colorful mix of crunchy vegetables and creamy cheese that makes for a tasty and satisfying meal. Perfect for both kids and adults, this snack box is not only easy to prepare but also portable, making it ideal for lunchboxes or picnics.
This recipe highlights the natural flavors of fresh veggies combined with the richness of cheese. You can customize it based on your favorite ingredients or what’s available in your fridge. Plus, it’s a great way to sneak in some extra nutrients into your day!
Ingredients
- 1 cup cubed cheese (cheddar, mozzarella, or your favorite)
- 1 cup carrot sticks
- 1 cup broccoli florets
- 1 cup grape tomatoes
- 1 cup celery sticks
- 1/2 cup sliced red onion
- Your favorite dip (hummus, ranch, or tzatziki)
Instructions
- Prepare the Vegetables: Wash and cut the vegetables into bite-sized pieces. Arrange the carrot sticks, broccoli florets, grape tomatoes, celery sticks, and red onion in your snack box.
- Add the Cheese: Place the cubed cheese in the box, ensuring it’s evenly distributed among the vegetables.
- Include a Dip: Pack a small container with your favorite dip to accompany the veggies and cheese for added flavor.
- Seal and Store: Close the box securely and store it in the refrigerator until you’re ready to enjoy!
Caprese Salad Skewers

Caprese Salad Skewers are a fun and fresh take on the classic Italian salad. Combining juicy cherry tomatoes, creamy mozzarella balls, and fragrant basil, these skewers are bursting with flavor. They offer a delightful balance of sweetness and tanginess, making them a perfect light lunch or snack.
These skewers are easy to prepare and make a great addition to any lunchbox. Simply thread the ingredients onto skewers, drizzle with balsamic glaze, and you’re good to go! They are not only tasty but also visually appealing, making them a hit with both kids and adults.
Ingredients
- 1 pint cherry tomatoes
- 1 pound mozzarella balls (bocconcini)
- Fresh basil leaves
- Balsamic glaze (optional)
- Salt and pepper to taste
- Wooden skewers
Instructions
- Assemble the skewers by alternating cherry tomatoes and mozzarella balls, adding a basil leaf between each.
- Continue until all ingredients are used up, placing them evenly on the skewers.
- Drizzle with balsamic glaze if desired and sprinkle with salt and pepper.
- Pack into a lunchbox or serve immediately for a refreshing bite.
Fruit and Nut Energy Bites
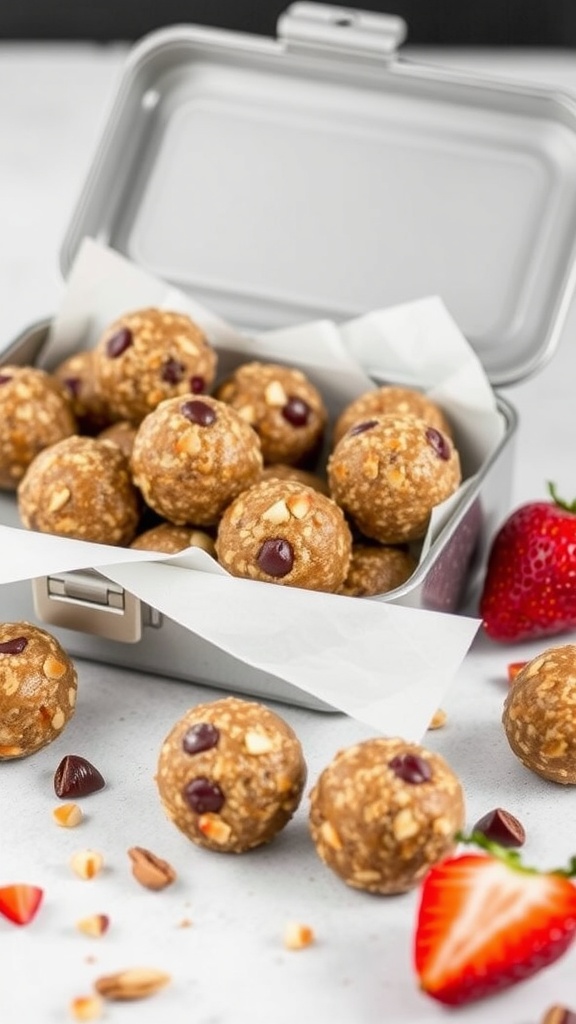
Fruit and nut energy bites are a fantastic way to combine healthy snacks with delightful flavors. These little treats are packed with nutrients and provide a quick boost of energy, making them perfect for lunchboxes or on-the-go snacking. With a blend of oats, nuts, and dried fruits, they’re chewy, satisfying, and super easy to whip up!
Making these energy bites is a breeze. Simply mix your ingredients, roll them into bite-sized balls, and they’re ready to enjoy. They can be customized with your favorite nuts or dried fruits, making them a versatile snack that kids and adults alike will love.
Ingredients
- 1 cup rolled oats
- 1/2 cup nut butter (peanut, almond, or your choice)
- 1/3 cup honey or maple syrup
- 1/2 cup chopped nuts (almonds, walnuts, or pistachios)
- 1/2 cup dried fruit (raisins, cranberries, or apricots)
- 1/4 cup mini chocolate chips (optional)
- 1 teaspoon vanilla extract
- Pinch of salt
Instructions
- Combine Ingredients: In a large bowl, mix together rolled oats, nut butter, honey or maple syrup, vanilla extract, and salt until fully combined.
- Add Nuts and Fruits: Fold in chopped nuts, dried fruit, and chocolate chips if using until well mixed.
- Form the Bites: With your hands, roll the mixture into small balls, about 1 inch in diameter.
- Chill: Place the energy bites on a baking sheet lined with parchment paper and refrigerate for at least 30 minutes to firm up.
- Store: Once set, transfer them to an airtight container and store in the fridge for up to a week.
Rice and Bean Burritos
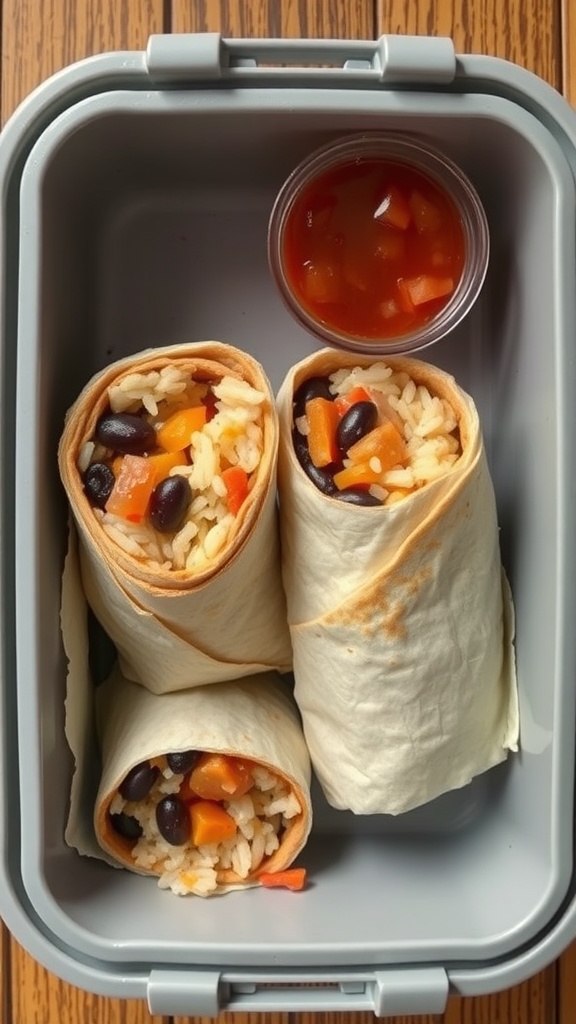
Rice and bean burritos are a delicious and satisfying option for a budget-friendly lunch. These wraps combine fluffy rice, protein-packed beans, and colorful veggies, all tucked into a soft tortilla. They are not only easy to make but also customizable, allowing you to add your favorite ingredients.
The taste is comforting and hearty, making them a perfect choice for a midday meal. Plus, they can be made in advance and stored in the fridge for a quick grab-and-go lunch!
Ingredients
- 1 cup cooked rice
- 1 can black beans, rinsed and drained
- 1 bell pepper, diced
- 1 small onion, diced
- 1 teaspoon cumin
- Salt and pepper to taste
- 4 large flour tortillas
- 1 cup shredded cheese (optional)
- Salsa for serving
Instructions
- In a large bowl, combine the cooked rice, black beans, diced bell pepper, onion, cumin, salt, and pepper. Mix until everything is well combined.
- Heat a skillet over medium heat. Warm the tortillas for about 30 seconds on each side until pliable.
- Spoon the rice and bean mixture onto the center of each tortilla, adding cheese if desired. Fold in the sides and roll up tightly.
- Place the burritos seam-side down in the skillet and cook for about 2-3 minutes on each side until golden and crisp.
- Serve with salsa on the side for dipping.
Sweet Potato and Black Bean Tacos
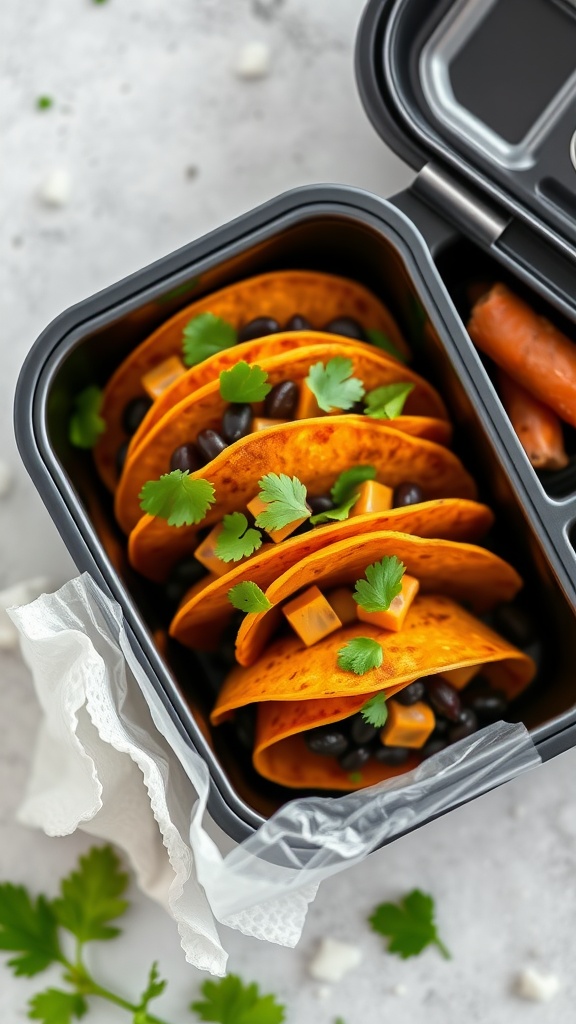
Sweet potato and black bean tacos are a delicious and nutritious choice for lunchboxes. The natural sweetness of the roasted sweet potatoes pairs perfectly with the savory black beans, creating a flavor that is both hearty and satisfying. These tacos are not only tasty but simple to prepare, making them an ideal option for busy weekdays.
With vibrant colors and a pop of fresh cilantro, these tacos are visually appealing, too. They can be easily customized with your favorite toppings, whether it’s cheese, avocado, or salsa. This recipe is a hit with both kids and adults alike!
Ingredients
- 2 medium sweet potatoes, peeled and diced
- 1 can black beans, drained and rinsed
- 1 tablespoon olive oil
- 1 teaspoon cumin
- 1/2 teaspoon chili powder
- Salt and pepper to taste
- 8 small tortillas
- Fresh cilantro, for garnish
- Optional toppings: cheese, avocado, salsa
Instructions
- Preheat the oven to 400°F (200°C). Toss the diced sweet potatoes with olive oil, cumin, chili powder, salt, and pepper on a baking sheet. Roast for 25-30 minutes until tender.
- In a separate bowl, mix the black beans with a pinch of salt and pepper. Warm them up in a pan over medium heat until heated through.
- Warm the tortillas in a pan or microwave until pliable.
- Assemble the tacos: Place a spoonful of sweet potatoes and black beans on each tortilla. Top with fresh cilantro and any additional toppings you like.
- Serve immediately or pack them up for a tasty lunch on the go!
Cucumber and Cream Cheese Sandwiches
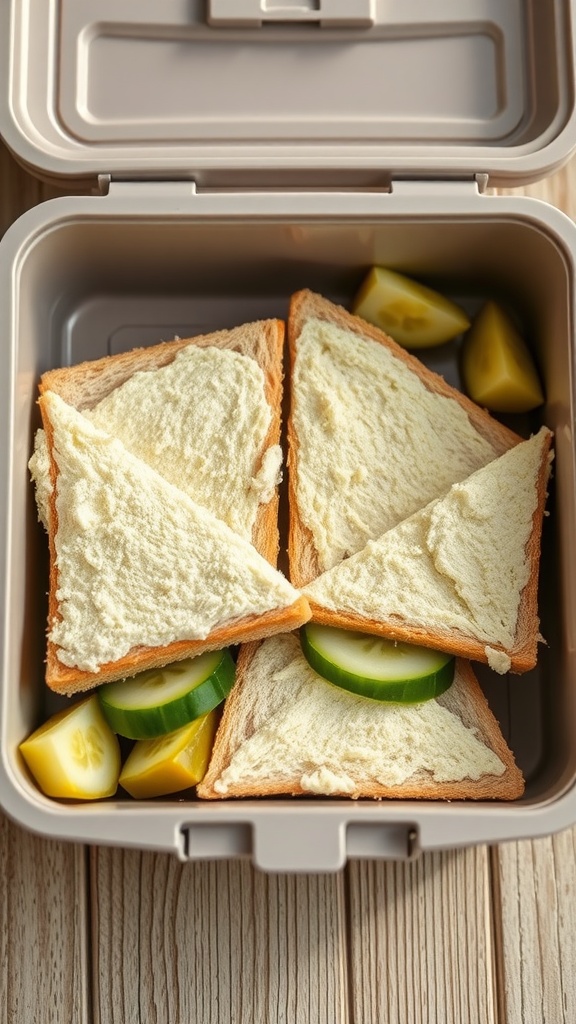
Cucumber and cream cheese sandwiches are a delightful and refreshing option for lunchboxes. They offer a light, crisp flavor that’s perfect for any midday meal. Plus, they’re simple to whip up, making them an ideal choice for busy days.
The combination of smooth cream cheese and cool cucumber creates a delightful contrast. These sandwiches are not only tasty but also visually appealing, making them a hit with kids and adults alike. Serve them cut into fun shapes or traditional triangles for added charm.
Ingredients
- 8 slices of bread
- 1 cup cream cheese, softened
- 1 medium cucumber, thinly sliced
- Salt and pepper to taste
- Fresh herbs (like dill or chives) for garnish (optional)
Instructions
- Spread cream cheese evenly on one side of each slice of bread.
- Layer the cucumber slices on four of the cream cheese-covered bread slices. Sprinkle with salt and pepper, and add herbs if desired.
- Top with the remaining slices of bread, cream cheese side down, to form sandwiches.
- Cut the sandwiches into quarters or triangles, as preferred.
- Pack them neatly in a lunchbox, and enjoy!