10 Must-Try No-Bake Desserts for a Sweet Week
If you’re looking to satisfy your sweet tooth without turning on the oven, we’ve rounded up ten fantastic no-bake desserts you should try this week. These easy-to-make treats combine delicious flavors and simple ingredients, so you can whip them up in no time—perfect for any occasion or just because! Get ready for some tasty inspiration!
Coconut Chia Seed Pudding
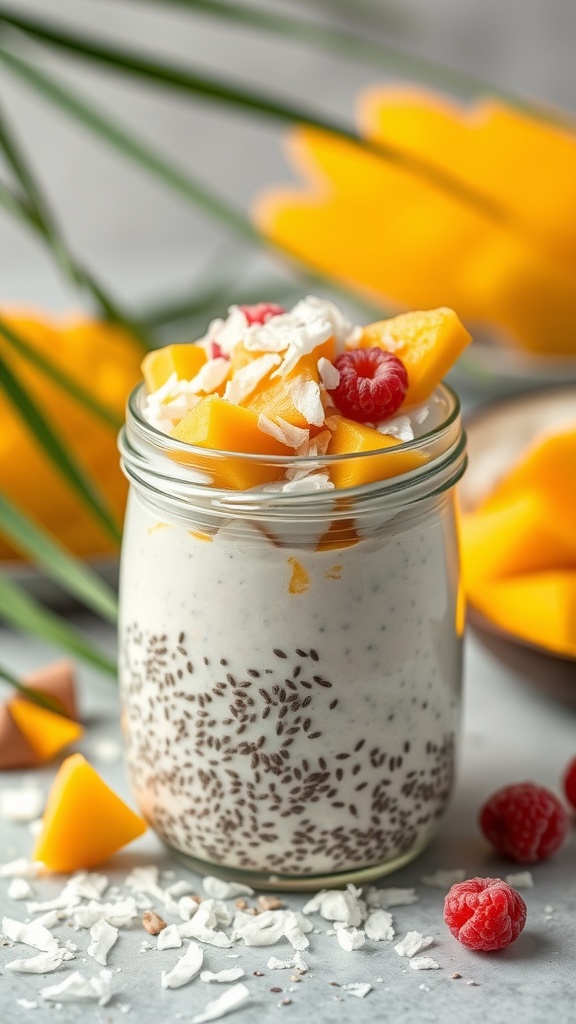
Coconut chia seed pudding is a delightful treat that’s both creamy and satisfying. It’s naturally sweetened with coconut milk, making each bite a tropical escape. This dessert is incredibly simple to make, requiring just a few ingredients and minimal effort. Plus, it’s a great way to enjoy a healthy option without compromising on taste.
The texture of the chia seeds creates a pleasing contrast with the smooth coconut base, while toppings like fresh mango and raspberries add a burst of flavor and color. Perfect for breakfast or a light dessert, this pudding is sure to impress.
Ingredients
- 1 cup coconut milk
- 1/4 cup chia seeds
- 2 tablespoons maple syrup (optional)
- 1/2 teaspoon vanilla extract
- Fresh mango, diced
- Raspberries
- Shredded coconut, toasted
Instructions
- In a mixing bowl, combine coconut milk, chia seeds, maple syrup, and vanilla extract. Whisk until well blended.
- Cover the bowl and refrigerate for at least 4 hours or overnight, allowing the chia seeds to expand and thicken the mixture.
- Once set, stir the pudding to break up any clumps. Serve in individual jars or bowls.
- Top with fresh mango, raspberries, and a sprinkle of toasted coconut before enjoying.
No-Bake Peanut Butter Bars
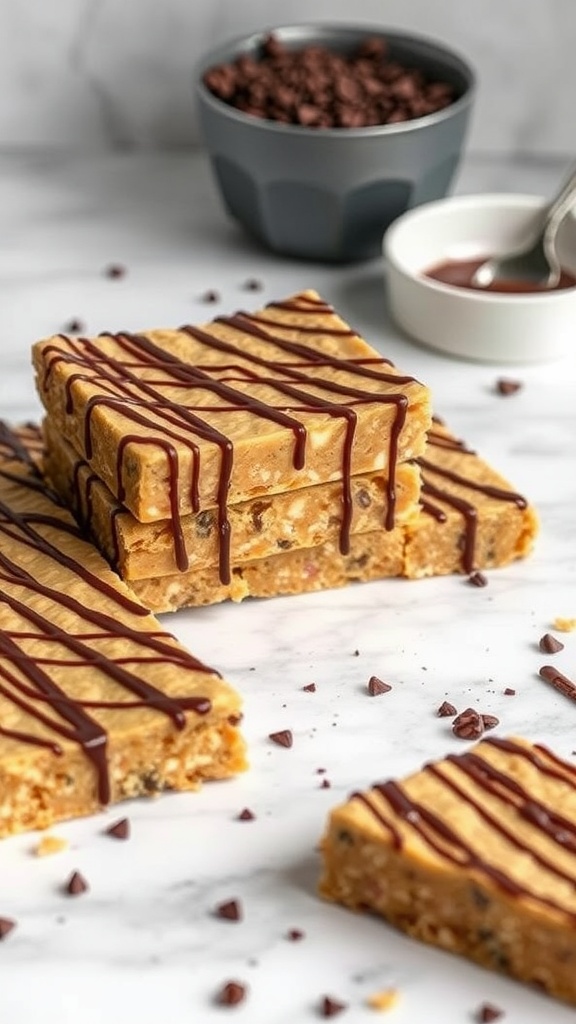
No-bake peanut butter bars are a delightful treat that combines the rich, creamy taste of peanut butter with a crunchy base and a drizzle of chocolate on top. Perfect for those who crave something sweet without the fuss of baking, these bars are both satisfying and easy to whip up.
With minimal effort and simple ingredients, you can make these bars in no time. They are great for satisfying your sweet tooth or serving at gatherings. The combination of textures and flavors will have everyone coming back for more!
Ingredients
- 1 cup creamy peanut butter
- 1/2 cup honey or maple syrup
- 2 cups rolled oats
- 1 cup chocolate chips
- 1/4 cup unsweetened cocoa powder
- 1 teaspoon vanilla extract
Instructions
- In a medium bowl, mix together the peanut butter and honey until well combined.
- Add the rolled oats, cocoa powder, and vanilla extract, stirring until fully incorporated.
- Press the mixture into a greased or lined 9×9 inch pan, smoothing the top with a spatula.
- Melt the chocolate chips in a microwave-safe bowl, heating in 30-second intervals and stirring until smooth.
- Drizzle the melted chocolate over the pressed mixture and refrigerate for at least 1 hour to set.
- Once set, cut into bars and enjoy!
Lemon Blueberry Cheesecake Bites
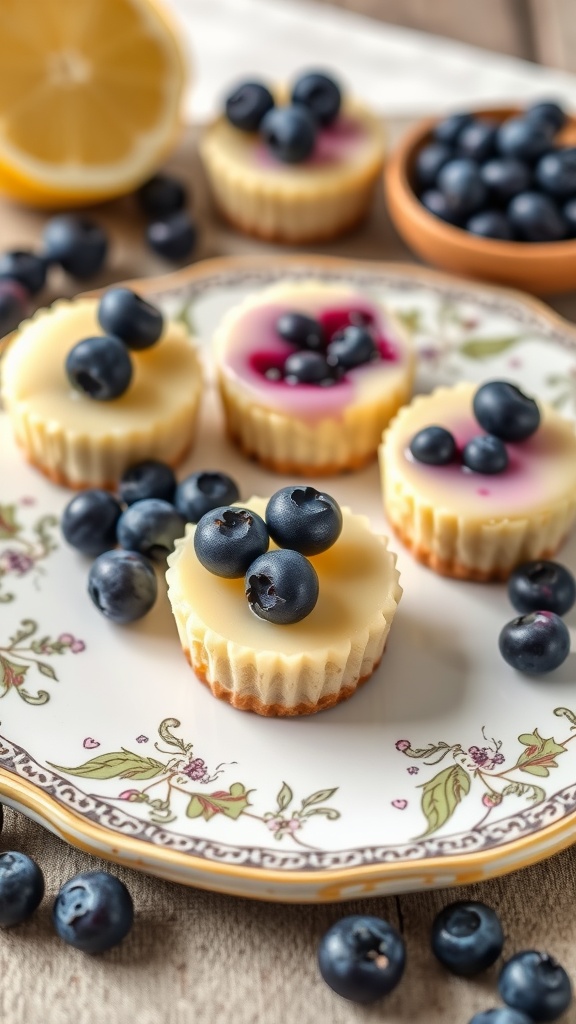
Lemon Blueberry Cheesecake Bites are a delightful treat that perfectly balance creamy cheesecake flavor with zesty lemon and sweet blueberries. These bites are incredibly simple to make, requiring no baking and just a few ingredients, making them ideal for a quick dessert option.
The rich, creamy texture paired with the burst of tartness from the lemon and the freshness of blueberries creates an irresistible flavor combination. Perfect for gatherings or a sweet snack at home, these bites will surely impress your friends and family!
Ingredients
- 1 cup of graham cracker crumbs
- 1/4 cup unsalted butter, melted
- 1 (8 oz) package cream cheese, softened
- 1/2 cup powdered sugar
- 1/4 cup sour cream
- 2 tablespoons fresh lemon juice
- 1 teaspoon vanilla extract
- 1 cup fresh blueberries
Instructions
- Prepare the Crust: In a bowl, mix the graham cracker crumbs with melted butter until combined. Press the mixture into the bottom of mini cupcake liners or a muffin tin to form a crust.
- Make the Filling: In another bowl, beat the cream cheese until smooth. Add powdered sugar, sour cream, lemon juice, and vanilla extract. Mix until well combined and creamy.
- Assemble: Spoon the cheesecake filling over the crust in each liner, filling them just to the top. Smooth the surface with a spatula.
- Chill: Place the filled cups in the refrigerator for at least 2 hours or until set.
- Top with Blueberries: Before serving, top each cheesecake bite with fresh blueberries for a pop of color and flavor.
Mint Chocolate Chip Icebox Cake

This Mint Chocolate Chip Icebox Cake is a delightful treat that combines the refreshing flavor of mint with rich chocolate. Perfect for warm days, this no-bake dessert is simple to prepare and requires minimal effort, making it a fantastic choice for anyone looking to satisfy their sweet tooth without turning on the oven.
Layers of chocolate wafer cookies are interspersed with a creamy mint filling, creating a light yet indulgent dessert. The chilled cake sets beautifully in the refrigerator, allowing the flavors to meld together. It’s a crowd-pleaser that’s sure to impress at any gathering!
Ingredients
- 2 cups heavy whipping cream
- 1 cup powdered sugar
- 1 teaspoon vanilla extract
- 1 teaspoon peppermint extract
- 2 cups mint chocolate chip cookies, crushed
- 1 package chocolate wafer cookies
- Chocolate shavings for garnish
Instructions
- Whip the cream: In a large bowl, beat the heavy whipping cream, powdered sugar, vanilla extract, and peppermint extract until stiff peaks form.
- Layer the cake: In a rectangular baking dish, arrange a layer of chocolate wafer cookies at the bottom. Spread a layer of the whipped mint cream over the cookies, then sprinkle a layer of crushed mint chocolate chip cookies.
- Repeat layers: Continue layering with more chocolate wafer cookies, whipped cream, and crushed cookies until you run out of ingredients, finishing with a layer of whipped cream on top.
- Chill: Cover the dish with plastic wrap and refrigerate for at least 4 hours, or overnight for best results.
- Serve: Before serving, garnish with chocolate shavings. Slice and enjoy your refreshing Mint Chocolate Chip Icebox Cake!
Raspberry Coconut Bars
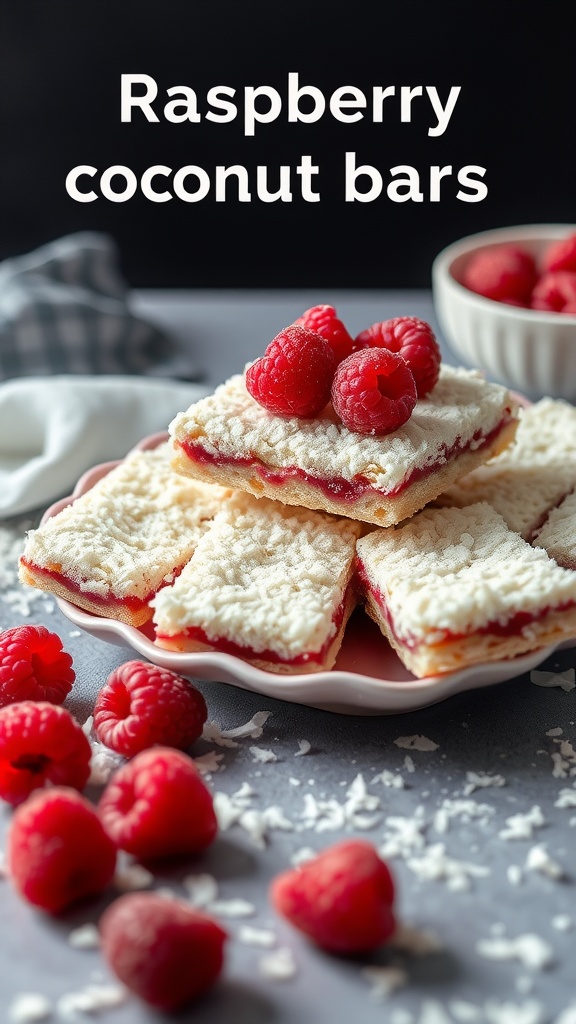
Raspberry coconut bars are a delightful treat that perfectly balances sweet and tart flavors. The soft, chewy coconut layer pairs beautifully with the vibrant raspberry filling, making each bite a burst of taste. This no-bake dessert is incredibly simple to prepare, requiring minimal ingredients and time, which is a win for busy days!
Whether you’re enjoying them as an afternoon snack or serving them at a gathering, these bars are sure to impress. Plus, they’re a great way to showcase fresh raspberries. Let’s dive into the recipe!
Ingredients
- 1 cup graham cracker crumbs
- 1/4 cup sugar
- 1/2 cup unsalted butter, melted
- 1 cup fresh raspberries (or raspberry jam)
- 2 cups shredded coconut
- 1/2 cup sweetened condensed milk
Instructions
- Prepare the Base: In a medium bowl, mix graham cracker crumbs, sugar, and melted butter until well combined. Press this mixture firmly into the bottom of a greased 9×9-inch baking dish to form a crust.
- Add the Raspberry Layer: Spread the fresh raspberries or raspberry jam evenly over the crust, creating a nice layer.
- Make the Coconut Topping: In another bowl, combine shredded coconut and sweetened condensed milk. Mix until the coconut is fully coated.
- Spread the Coconut Mixture: Evenly distribute the coconut mixture over the raspberry layer, pressing down gently to ensure it sticks.
- Chill and Serve: Refrigerate the bars for at least 2 hours or until set. Once firm, cut into squares and serve chilled. Enjoy your delicious raspberry coconut bars!
Chocolate Avocado Mousse
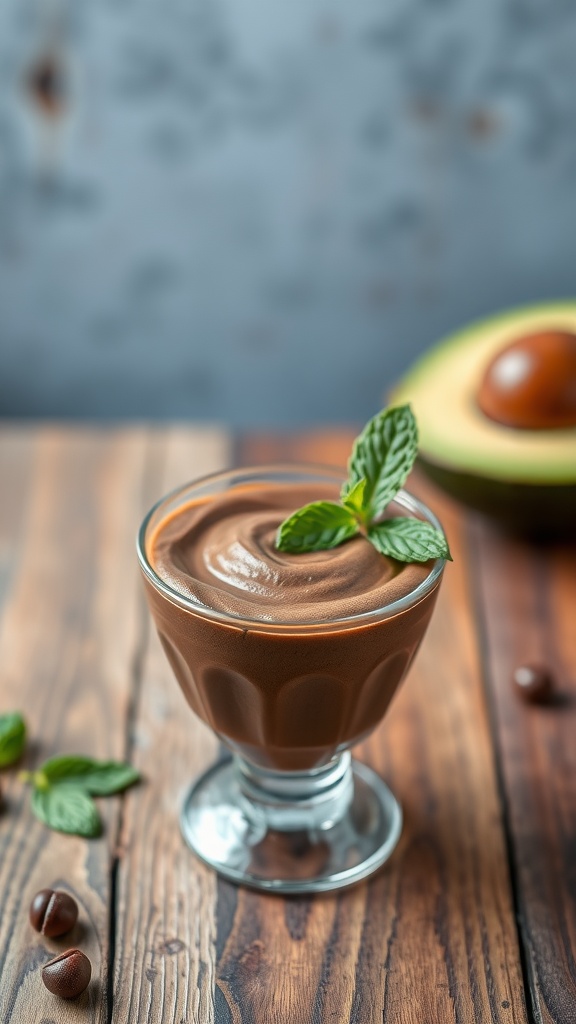
Chocolate avocado mousse is a rich and creamy dessert that surprises with its unique combination of flavors. The natural creaminess of ripe avocados blended with rich cocoa powder creates a smooth texture that feels indulgent without the guilt. This dessert is not only delicious but also simple to make, requiring just a few ingredients and minimal prep time. Perfect for satisfying a chocolate craving, it’s a great way to enjoy a healthy treat!
The recipe is easy to follow, making it ideal for anyone, whether you’re a novice in the kitchen or a seasoned pro. In just a few short steps, you can whip up this delightful dessert that’s sure to impress friends and family.
Ingredients
- 2 ripe avocados
- 1/4 cup cocoa powder
- 1/4 cup honey or maple syrup
- 1/2 cup almond milk (or any milk of your choice)
- 1 teaspoon vanilla extract
- Pinch of salt
- Fresh mint leaves for garnish (optional)
Instructions
- Prepare the Avocados: Cut the avocados in half, remove the pit, and scoop the flesh into a blender or food processor.
- Add the Ingredients: To the avocados, add cocoa powder, honey or maple syrup, almond milk, vanilla extract, and a pinch of salt.
- Blend Until Smooth: Blend all the ingredients together until you have a creamy, smooth mixture. Scrape down the sides as needed to ensure everything is well combined.
- Taste and Adjust: Taste the mousse and adjust sweetness or cocoa powder if desired. Blend again to incorporate any changes.
- Chill and Serve: Spoon the mousse into serving dishes and chill in the refrigerator for at least 30 minutes. Before serving, garnish with fresh mint leaves if you like.
Strawberry Shortcake Parfaits
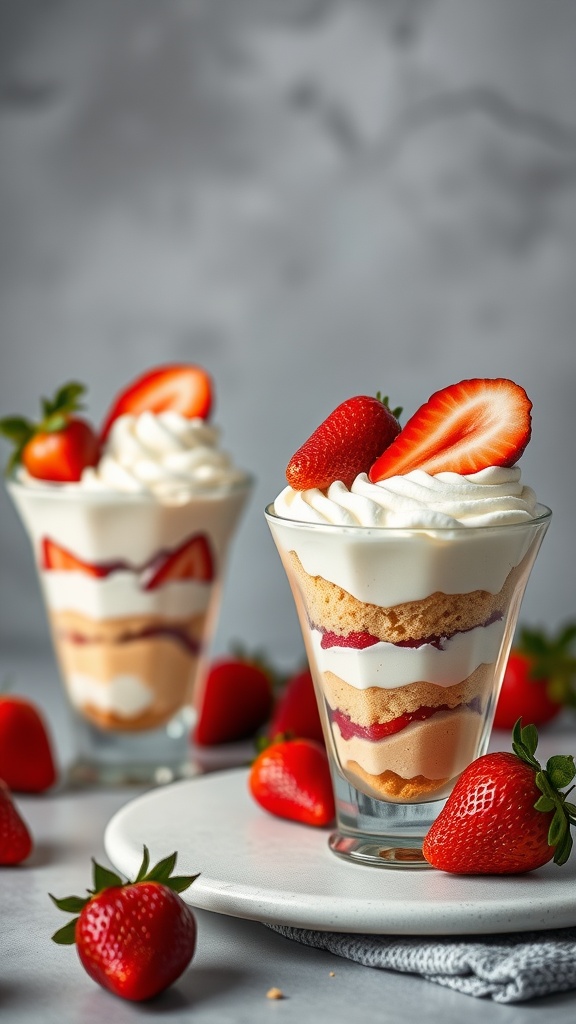
Strawberry Shortcake Parfaits are a delightful treat that capture the essence of summer. These layered desserts combine fluffy whipped cream, fresh strawberries, and sweet cake or biscuit pieces, creating a perfect balance of textures and flavors. They’re not just easy to make, but they also look beautiful in serving glasses, making them ideal for any occasion.
With just a few simple ingredients, you can whip these up in no time. The sweetness of the strawberries pairs wonderfully with the creamy layers, making each spoonful a delightful experience. Whether you’re hosting a gathering or simply treating yourself, these parfaits are sure to impress!
Ingredients
- 2 cups fresh strawberries, hulled and sliced
- 1/4 cup granulated sugar
- 1 cup heavy whipping cream
- 2 tablespoons powdered sugar
- 1 teaspoon vanilla extract
- 1 cup shortcake or sponge cake, cut into pieces
Instructions
- Prepare the Strawberries: In a bowl, combine sliced strawberries and granulated sugar. Toss to coat and let them sit for about 10-15 minutes to release their juices.
- Make the Whipped Cream: In a separate bowl, beat the heavy whipping cream with powdered sugar and vanilla extract until soft peaks form.
- Assemble the Parfaits: In serving glasses, layer the cake pieces, followed by a layer of whipped cream, and then a layer of strawberries. Repeat the layers until you reach the top of the glass.
- Chill: Place the parfaits in the refrigerator for at least 30 minutes before serving to allow the flavors to meld.
- Serve: Garnish with additional whipped cream and a strawberry on top before serving.
Matcha Green Tea Energy Bites
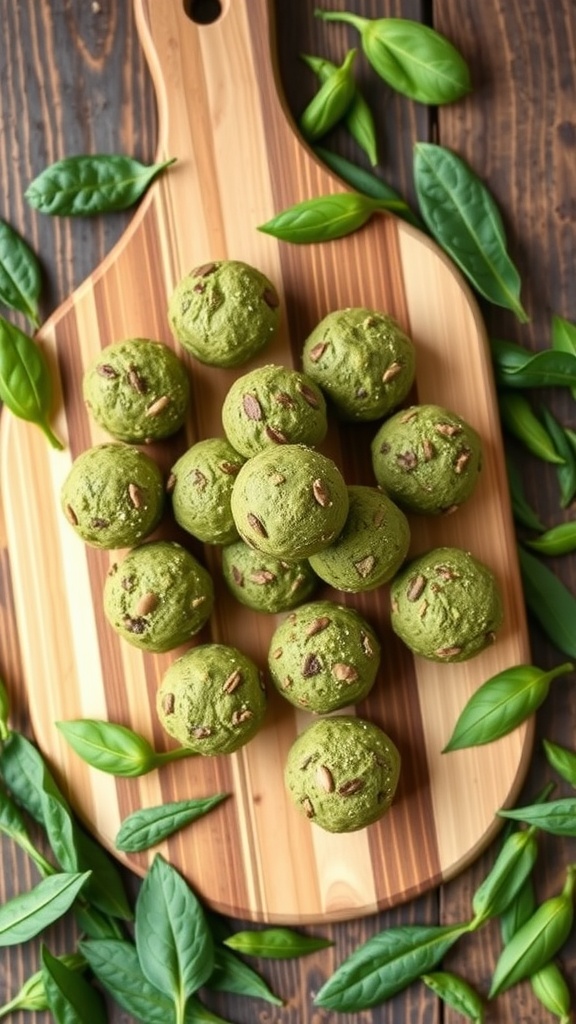
Matcha Green Tea Energy Bites are a tasty and nutritious treat that gives you a boost without any baking required. These little balls of goodness combine the earthy flavor of matcha with a hint of sweetness, making them both satisfying and energizing. Perfect for a quick snack or an afternoon pick-me-up, they’re simple to whip up and require minimal effort.
Not only are these bites delicious, but they’re also packed with energy-boosting ingredients like oats and nuts. The best part? You can customize them with your favorite mix-ins like chocolate chips or dried fruit. Give them a try for a healthy snack that satisfies your sweet tooth without the guilt!
Ingredients
- 1 cup rolled oats
- 2 tablespoons matcha green tea powder
- 1/2 cup almond butter or peanut butter
- 1/4 cup honey or maple syrup
- 1/4 cup chopped nuts (walnuts or almonds)
- 1/4 cup chocolate chips or dried fruit (optional)
- 1 teaspoon vanilla extract
Instructions
- Mix Ingredients: In a large bowl, combine the rolled oats and matcha powder. Add the almond butter, honey (or maple syrup), and vanilla extract. Stir until well combined.
- Add Mix-Ins: Fold in the chopped nuts and, if desired, chocolate chips or dried fruit.
- Form Bites: Use your hands to roll the mixture into small balls, about 1 inch in diameter.
- Chill: Place the energy bites on a baking sheet lined with parchment paper. Refrigerate for at least 30 minutes to firm up.
- Enjoy: Once set, enjoy your energy bites as a quick snack or store them in an airtight container in the fridge for up to a week.
Almond Joy Energy Balls

Almond Joy Energy Balls are a delightful treat that captures the classic flavors of the beloved candy bar. With a rich combination of chocolate, coconut, and almonds, these no-bake snacks are not only delicious but also simple to whip up. Perfect for a quick energy boost, they’re a healthier alternative to traditional sweets.
Making these energy balls is straightforward, requiring just a few ingredients and minimal prep time. They’re great for snacking on the go or satisfying that sweet tooth without the fuss of baking. Enjoy a taste of indulgence while keeping things wholesome!
Ingredients
- 1 cup dates, pitted
- 1 cup almonds
- 1 cup shredded coconut
- 1/4 cup almond butter
- 1/4 cup cocoa powder
- 1 teaspoon vanilla extract
- 1/4 teaspoon sea salt
Instructions
- Blend the Ingredients: In a food processor, combine dates, almonds, shredded coconut, almond butter, cocoa powder, vanilla extract, and sea salt. Pulse until the mixture is well combined and sticky.
- Form the Balls: Scoop out small portions of the mixture and roll them into bite-sized balls using your hands. Place them on a baking sheet lined with parchment paper.
- Chill: Refrigerate the energy balls for about 30 minutes to firm them up.
- Serve: Enjoy straight from the fridge or store them in an airtight container for up to a week!
Peach and Cream Tart
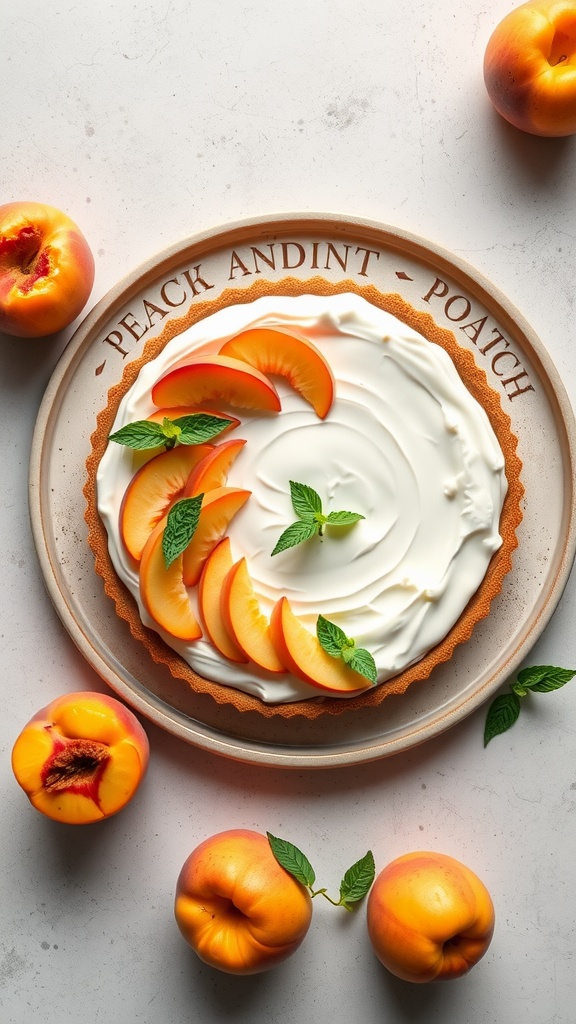
This Peach and Cream Tart is a delightful no-bake dessert that brings the sweetness of fresh peaches together with creamy goodness. It’s light, refreshing, and perfect for a summer treat. Plus, it’s super easy to whip up, making it a great choice for those who want something delicious without spending hours in the kitchen.
The crust is made from simple ingredients, and the filling is a smooth blend of cream cheese and whipped cream, which complements the juicy peach slices beautifully. This tart is not just a feast for the taste buds; it also looks stunning on the table, making it a showstopper for any occasion!
Ingredients
- 1 pre-made graham cracker crust
- 8 ounces cream cheese, softened
- 1/2 cup powdered sugar
- 1 cup heavy cream
- 1 teaspoon vanilla extract
- 3-4 ripe peaches, sliced
- Fresh mint leaves for garnish
Instructions
- Prepare the Filling: In a mixing bowl, beat the softened cream cheese and powdered sugar together until smooth. Add the vanilla extract and mix well.
- Whip the Cream: In a separate bowl, whip the heavy cream until stiff peaks form. Gently fold the whipped cream into the cream cheese mixture until fully combined.
- Assemble the Tart: Spoon the cream filling into the graham cracker crust and spread it evenly. Arrange the sliced peaches on top in a decorative pattern.
- Chill: Refrigerate the tart for at least 2 hours to set. Garnish with fresh mint leaves before serving.